Ever Wondered How People Make Digital Planning Look So Easy?
You’ve got the iPad. You’ve got the Apple Pencil. You even downloaded one of those beautiful planner apps that look amazing in videos. But when you open it up… all you see is a blank page.
Now what?
You start thinking, “Am I missing something?”
Nope. You’re not. This is where most people get stuck, and it’s normal. The truth is, digital planning may look easy, but getting started can feel confusing. Where do you write? How do you organize your week? What do all those buttons even do? Don’t stress. You don’t need to be a tech expert or a super organized person to figure it out.
In this guide, I’ll show you how to use digital handwriting with your iPad planner in a way that feels easy, fun, and personal. You’ll learn simple tips, cool tricks, and real ways to make your planner work for your life.
By the end, you won’t just be writing on your iPad, you’ll feel in control, creative, and maybe even excited to plan your day.
Table of Contents
1. Why You Should Ditch Paper Planners and Go All-Digital with Your iPad
2. What Is the Best iPad Planner App for Digital Handwriting?
3. How Do You Set Up Your Digital iPad Planner Like a Pro?
4. What Are the Must-Know Handwriting Tools and Features?
5. Can You Customize Templates and Layouts in Your iPad Planner?
6. How Can You Make Your Planner Visually Appealing?
7. What Are Real Examples of Digital Planner Workflows?
8. What Are Some Bonus Tips and Mistakes to Avoid?
9. How Do You Make the Most of This New Planning Method?
10. conclusion
Why You Should Ditch Paper Planners and Go All-Digital with Your iPad
We get it—there’s something special about writing on paper. But when life gets busy and plans keep changing, a paper planner just doesn’t cut it. That’s where your iPad and Apple Pencil come in.
With the right digital planner for iPad, planning starts to feel easy, like something you look forward to. You still get the freedom to write by hand, but now it’s flexible, organized, and totally in sync with your busy life.
Whether you’re mapping out your week, setting goals that actually stick, or just jotting down thoughts, a digital planner helps you do it all, without the mess, and with a lot more fun.
Your Planner Lives Inside Your iPad – No Extra Weight.
Forget carrying bulky notebooks or binders everywhere you go. With your iPad, your planner is built-in. Whether you’re at your desk, in class, or relaxing on the couch, your schedule is always just a tap away.
You don’t have to worry about leaving your notebook at home or misplacing a page. Everything stays neat, compact, and right where you need it, on one single device. And if you already use your iPad for school, work, or drawing, keeping your planner on it just makes sense.
One device. Zero clutter. Total convenience.
Write Naturally—Just Like Paper (But Smarter)
Thanks to the Apple Pencil, writing on your iPad feels smooth, natural, and just like using a real pen. You can jot down your to-do list, write a journal entry, or sketch out your ideas without any hassle.
There’s no lag, no smudges, and no awkwardness — just easy, free-flowing handwriting. Want a cleaner look? Many apps like GoodNotes or Notability can convert your handwriting into neat typed text. You get the best of both worlds: real handwriting and smart editing tools.
It’s writing, but better.
Add New Pages, Layouts & Sections Instantly
Paper planners have limits. Once the pages are full, that’s it. But with your iPad planner, you can add unlimited pages whenever you need them.
Busy day? Add a new daily layout.
Want to track your meals or habits? Create a brand-new section in seconds. You can also duplicate templates, switch designs, or build planners for different parts of your life — all with a tap.
You’re never stuck with one setup. You plan your way.
Personalize Without Pens, Stickers, or Supplies
Want your planner to look cute, clean, or completely personalized? With your iPad, you can do it all, no physical stickers, pens, or supplies needed. Add digital stickers, headers, or quotes to decorate your pages.
Highlight important tasks, change font styles, and color-code anything. You can even change the whole theme of your planner as often as you like — from minimal to colorful and back again.
It’s personal, fun, and all digital.
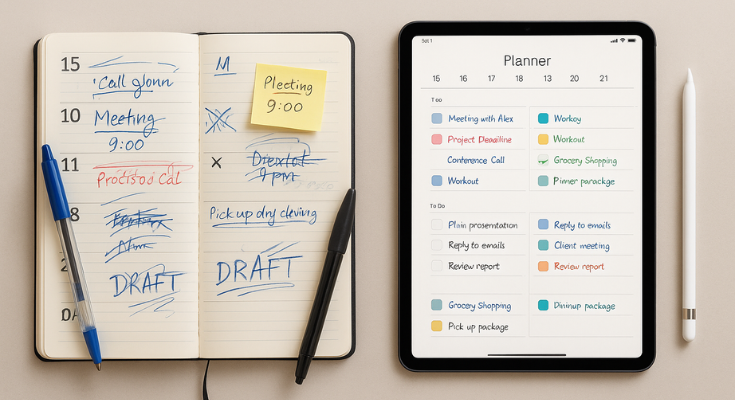
Easy to Edit—No Cross-Outs or Messy Pages
Paper planners can get messy fast. Crossed-out plans, rescheduled tasks, torn pages, it adds up. But on your iPad, editing is easy. You can erase cleanly, move things around with your finger, or undo any mistake in a single tap.
If something changes, and let’s be real, it always does, you can update your planner instantly without leaving a trace. No more rewriting your whole week. No more mess.
Just a clean, flexible planning space that adjusts with you.
Find Anything You’ve Written in Seconds
Ever forget where you wrote something in your paper planner? With your iPad planner, you don’t need to flip through pages anymore. Many apps let you search handwritten notes, so you can find anything just by typing a word.
You can also jump straight to bookmarks, tagged sections, or important pages. Everything is organized and easy to find, even weeks later.
It’s like having a smart assistant built into your planner.
Built for Visual Thinkers and Creatives
If you’re a visual thinker, digital handwriting on the iPad is a dream. You can sketch, doodle, and draw your thoughts directly on the page. Make mind maps, color-coded habit trackers, or even build your templates.
Whether you like simple outlines or expressive layouts, your iPad lets you be as creative as you want. It’s a planner, a notebook, a whiteboard, and a creative journal — all in one.
What Is the Best iPad Planner App for Digital Handwriting?
If you’re ready to start planning on your iPad with your Apple Pencil, the next step is choosing the right app. There are a lot of options out there, but don’t worry, I’ve made it easy for you.
Here’s a list of some of the best iPad planner apps that work great with handwriting. Whether you like things clean and simple or fun and creative, there’s something here for everyone.
1. Planwiz – Simple, Smart, and Built for Everyday Planning
If you want something easy to use, looks clean, and just works, the PlanWiz iPad planner app might be your new favorite. It’s made for people who want to plan without all the extra noise or confusion. The app opens fast, looks simple, and gives you exactly what you need to stay organized.
Whether you’re planning your day, tracking your goals, or just writing down reminders, PlanWiz makes it feel effortless.
- Works smoothly with Apple Pencil
- Super easy to use — no confusion
- Clean layout that’s not too crowded
- Great for setting goals, tracking habits, and staying focused
Planwiz is made for real life. You’ll feel organized without feeling overwhelmed.
2. GoodNotes – A Favorite for Writing and Organizing
If you love the feeling of writing by hand, GoodNotes is a classic favorite. It’s great for turning your iPad into a digital notebook, planner, or journal. You can create different notebooks for everything—school, work, life—and write in them just like you would on paper.
But here’s the magic part: you can move your writing around, erase it cleanly, and even convert your handwriting into typed text!
- Writing feels smooth and natural.
- You can turn your handwriting into neat text
- Great for school, work, or even personal journaling
If you like keeping things neat, you’ll probably love GoodNotes.
3. Notability – Perfect for Taking Notes and Listening Too
Planning and multitasking at the same time? Then you’ll love Notability. This app lets you write and record audio together—perfect if you’re in a class, a meeting, or just want to record your thoughts while you plan. You can listen back later and see your handwritten notes show up in sync with the recording. Pretty cool, right?
- Great for lectures, meetings, or classes
- You can use split-screen mode to see two things at once
- Mix typing, handwriting, and voice in one place
If you’re a student or someone who needs to take notes while listening, Notability is amazing.
4. Zinnia Journal & Planner – Creative and Fun
If you want your planner to feel more like a scrapbook or a creative journal, you’re going to love Zinnia. This app is all about self-expression. You can drag and drop stickers, change layouts, and decorate every page to match your mood or style.
Whether you’re tracking your mood, writing affirmations, or just making your planner pretty, Zinnia gives you endless options.
- Lots of creative tools to play with
- Easy to decorate your pages with your style
- Great for journaling, mood tracking, or self-care
Zinnia is perfect if you want your planner to be both useful and beautiful.
5. Noteshelf – Great Balance of Neat and Creative
Noteshelf is a great middle ground between structure and creativity. It’s known for its realistic handwriting feel, like writing with a pen on real paper, but smarter. The app has a clean look, easy navigation, and it lets you blend planning, journaling, and note-taking in one neat space.
You can add voice notes, make to-do lists, or just write freely—it adapts to your style.
- Realistic writing feels
- Simple, clean design
- Good for both planning and note-taking
If you want something easy but also flexible, Noteshelf is a great choice.
Want to explore more top-rated iPad planner apps? Take a look at this complete guide to the best iPad planner apps — it includes more great options to help you find the perfect fit for your planning style.
How Do You Set Up Your Digital iPad Planner Like a Pro?
Starting a digital planner can feel a little confusing, right? But it doesn’t have to be.
Once you set it up in a way that works for you, things get so much easier. You feel more organized, less stressed, and more ready to take on your day. And here’s the thing—it doesn’t need to be perfect. It just needs to feel right for you.
You don’t have to follow some fancy system or get everything figured out from the start. You just need a simple plan to begin. Whether you’re planning your day, tracking your goals, or just trying to keep life a little more together, this guide will walk you through the setup step by step.
So let’s keep it simple and build something that works for your life.
Steps to Get Started,
Step 1: Pick a Layout That Matches Your Life
Before anything else, think about how your days usually go. Are they packed with meetings or more open and flexible? The layout you choose should match your lifestyle, not stress you out.
- Daily Layout: Great if you like planning by the hour or need lots of space to write.
- Weekly Layout: Perfect for seeing everything coming up in one quick glance.
- Monthly Layout: Best for long-term plans, big events, and goal tracking.
There’s no perfect layout—only what works best for you. And the best part? You can always change it later if your routine shifts.
Step 2: Load Your Planner Template onto Your iPad
Once you’ve picked the layout that fits your life, it’s time to set things up. Don’t worry—you don’t have to start from scratch.
There are plenty of easy-to-use planner templates out there that you can load right into your app. Whether you’re looking for a simple weekly spread, a daily to-do list, or something more creative, templates make the whole process way easier (and a lot more fun). Just pick one that feels right and you’re good to go.
Step 3: Set Up Sections That Fit Your Life
Your planner isn’t just a calendar. It can hold all the different parts of your life—work, wellness, goals, finances, and more.
Here are some common sections you might want to include:
- Calendar – Your main planning pages (daily, weekly, or monthly)
- Goals – A place to write what you’re working toward and track your progress
- To-Do Lists – For personal tasks, shopping, errands, or project checklists
- Finances – Budget tracking, expenses, savings, or bill reminders
- Wellness – Meal plans, workouts, sleep, water intake, mood tracking
- Personal – Gratitude journaling, favorite quotes, books to read, or ideas
Start small with just a few sections. You can always add more as you go along.
Step 4: Use a Simple Color System
Color-coding is a quick way to make your planner easier to read and nicer to look at.
Try assigning one color to each area of your life:
- Work = Blue
- Health = Green
- Home/Family = Purple
- Personal = Pink
- Urgent = Red
You don’t need a rainbow; just a few clear, consistent colors will do the trick. Once you get used to it, you’ll be able to glance at your planner and instantly know what’s what.
Step 5: Make a Symbol Key That Works for You
Using a few simple symbols in your planner makes it easier to stay organized and saves you time rewriting the same things.
Here’s a sample system you can try:
- ○ = Task to do
- ✔ = Task completed
- ➜ = Moved to another day
- ✩ = Priority
- ✘ = Cancelled
- 🔁 = Repeating task
Feel free to create your own! What matters is that the symbols make sense to you. You might even want to keep a small reference list on one page in case you forget.
Step 6: Set It Up the Way Your Brain Works
This is where you make your planner truly yours.
Forget what you’ve seen on social media. Your setup doesn’t need to be pretty or perfect; it just needs to be practical.
Ask yourself:
- Do you love making lists? Use checklist-style pages.
- Do visuals help you focus? Add boxes, colors, or doodles.
- Like structure? Create weekly routines or use recurring templates.
Start with the basics: a few pages, a few colors, and your key sections. Once you feel more comfortable, you can add more layers over time—stickers, trackers, or even mood boards.
What Are the Must-Know Handwriting Tools and Features?
If you’re using an Apple Pencil with your iPad planner, you’re already off to a great start. But here’s the fun part: your Apple Pencil isn’t just a pen—it’s a magic tool that can help you plan, write, draw, and stay organized in super cool ways.
Let’s walk through some simple tools and features that will help you write neatly, stay in control, and make the most of your digital planner—no tech skills needed!
Pen Settings That Make a Big Difference
Before you start writing, it helps to set up your pen the way you like it. You can change how your writing looks with just a few small tweaks:
1. Pen Thickness
Want your writing to be easy to read? Go for a medium thickness. If the lines are too thin, they can be hard to see. If they’re too thick, they might look messy. Medium is just right for most people.
2. Pen Style
Most digital pens give you different styles.
- A ballpoint pen style is great for everyday writing. It keeps your notes neat and clean.
- A brush pen is more fun and flowy—perfect if you like a little creativity or want to doodle!
3. Palm Rejection
Ever accidentally draw with your hand while writing with your pencil? Turning on palm rejection helps the iPad ignore your hand while you write. So go ahead—rest your hand on the screen. It won’t mess up your notes.
4. Pressure Sensitivity
If you press harder, your lines get darker or thicker, just like a real pen. Press softly for lighter strokes. This helps make your writing feel more natural, almost like writing on paper.
The Magic of the Lasso Tool
The lasso tool is one of the coolest features in digital planning. It lets you grab your handwriting and do all sorts of helpful things with it.
Here’s what you can do with it:
- Move your writing: Wrote something in the wrong spot? Just circle it with the lasso and drag it where it needs to go.
- Resize your text or drawings: Made something too big? Too small? Circle it and change the size in a snap.
- Copy and paste: Want the same note or list on a different page? Lasso it, copy it, and paste it wherever you want.
- Convert handwriting to text (if your app supports it): This means your messy handwriting turns into typed words—so neat!
Easy Tips for Writing Neatly
Don’t worry if your handwriting doesn’t look perfect. With a few simple tricks, you can write neater and feel more in control while planning:
1. Zoom In
Pinch to zoom when writing small details. It gives you more space and helps your letters look cleaner.
2. Use Backgrounds
Choose a page with grid lines or dots in the background. It helps you write straight and keep things aligned. Just like a notebook!
3. Use a Paper-Feel Screen Protector
Your iPad screen is smooth, sometimes too smooth. A paper-feel screen protector adds a little friction, so it feels more like writing on real paper. It gives you a better grip and more control.
Your handwriting doesn’t need to be perfect; it just needs to be yours. These simple tools and tips can help you enjoy the process more, stay organized, and make planning feel easy and fun.
Once you get used to using your Apple Pencil with these tricks, writing on your iPad will feel like second nature. Just play around with the settings, find what feels good, and make it your own.
Can You Customize Templates and Layouts in Your iPad Planner?
Yes, you can, and that’s one of the best things about using a digital planner!
When you use a paper planner, you’re limited to whatever layout it comes with. But with a digital planner, you can mix and match, move things around, and create a setup that fits your life perfectly.
It’s like building a planner that matches your brain, your goals, and your routine. Let’s break it down and see how you can do it!
Layout Options You Can Try
When setting up your planner, you’ll find all kinds of page layouts. Each one has a different purpose, and you can use one or a mix depending on what you need.
- Daily Pages: These pages help you plan your day in detail. If you have a busy schedule or like planning hour by hour, this is perfect. You can write your tasks, events, reminders, and even what to eat for lunch!
- Weekly Spreads: This layout lets you see your whole week at a glance. It’s great for checking what’s coming up, tracking habits, or planning your week without feeling overwhelmed.
- Monthly Views: Want to plan your month or set big goals? Monthly pages are for that. You can mark birthdays, deadlines, holidays, and bigger projects here.
- Special Pages: You can add fun and helpful pages to your planner, like a budget tracker, meal plan, gratitude log, mood tracker, sleep chart, or a book list. These extras make planning more personal and useful. The best part? You don’t need to use everything—just pick the pages that fit your lifestyle and skip the ones you don’t need.
How to Create or Find New Layouts
Now, you might be thinking, “Where do I even get these pages?” Good news, there are lots of easy ways!
Make Your Own
If you like designing, you can make your planner pages using simple apps like:
- Canva
- PowerPoint
- Keynote
These apps have shapes, text boxes, and stickers you can drag and drop to create your own planner pages. It’s like digital arts and crafts!
Download From Online Shops or Groups
You don’t have to make everything from scratch. Planwiz offers a collection of beautiful planner templates you can start using right away. From simple, clean pages to fun and colorful designs, there’s something for every planning style. It’s all ready-to-use, so you can spend less time setting up and more time actually planning. Just download the ones you like, and add them to your planner!
Look for Hyperlinked Templates
Some planner pages come with clickable tabs or buttons built in. These help you jump from one section to another, like from the monthly page to a daily page, with just one tap. It makes your planner feel smart and super easy to use, especially when you’re in a hurry. Customizing your planner is like decorating your room. You get to decide what goes where, what you need, and what makes you feel good.
Start simple: pick a layout that feels comfortable, try a few special pages, and add more when you’re ready. There’s no “perfect” setup, just the one that works best for you.
And remember: with a digital planner, you can always erase, move, or change things. That’s the beauty of it. So go ahead, make your planner truly yours!
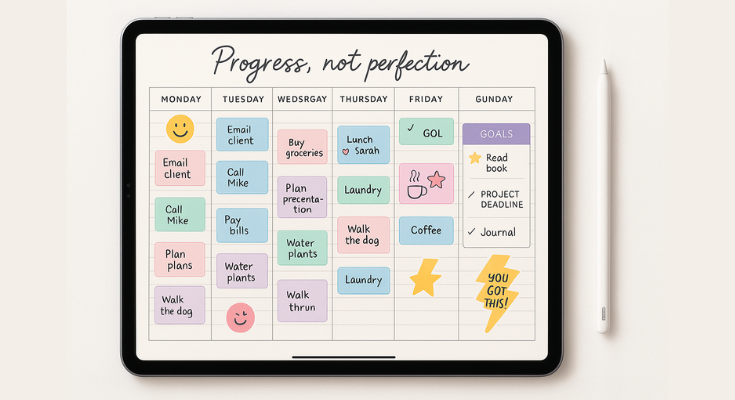
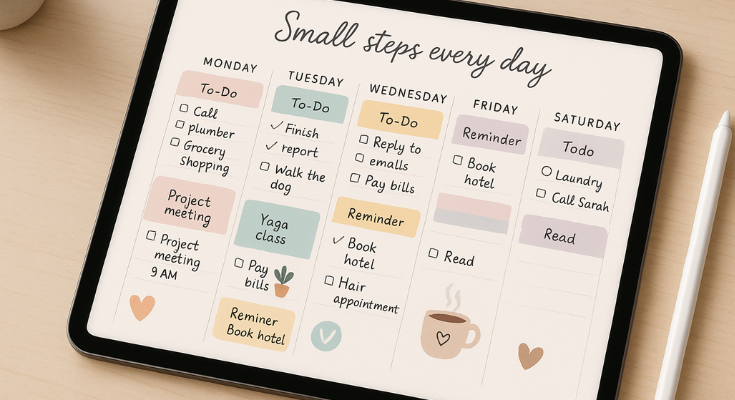
How Can You Make Your Planner Visually Appealing?
Let’s be honest, if your planner looks nice, you’re way more likely to use it. And no, it doesn’t need to be perfect or Pinterest-worthy. But adding a bit of color and creativity can make planning feel more enjoyable and help you stay consistent.
Here’s how you can give your digital planner a personal, eye-catching touch:
1. Color-Code Your Tasks
Color-coding is an easy way to keep things clear and organized. Try using different colors for different areas of your life, like:
- Blue for work
- Green for health and fitness
- Purple for personal stuff
- Yellow for urgent or important tasks
This makes it easier to scan your planner and know what’s coming up.
2. Add Digital Stickers or Icons
Digital stickers aren’t just cute, they can also make your planner more fun and expressive. You can use icons for things like workouts, appointments, coffee dates, or even mood trackers.
Some people like using seasonal or themed stickers, like flowers in spring or stars for weekly wins. It adds personality and makes your pages more enjoyable to flip through.
3. Use Highlighters to Mark Progress
Highlighting tasks, habits, or goals is a simple but powerful tool. You can:
- Highlight tasks you’ve finished
- Use different colors to show progress (half done, fully done, moved to another day)
- Highlight upcoming events or things that need extra attention
It keeps your pages interactive and gives you that little boost when you see things getting done.
4. Decorate with Quotes or Affirmations
Margins don’t have to be spaces. Fill them with things that inspire you!
Try adding:
- A motivational quote for the week
- A positive affirmation to stay focused
- A reminder to breathe, rest, or slow down
These little touches can turn your planner into a space that encourages and uplifts you, not just tracks your to-dos.
5. Create a Weekly “Decorate & Reset” Ritual
Pick one day a week, like Sunday, and spend 10–15 minutes decorating your planner for the days ahead. Add stickers, colors, quotes, or anything you love.
It doesn’t just make your planner look great; it turns planning into a relaxing, mindful routine. Like a mini self-care session that helps you reset and feel ready for the week.
What Are Real Examples of Digital Planner Workflows?
Ever wonder how other people use their digital planners day to day? The beauty of digital planning is that it works differently for everyone. Whether you’re a student, an entrepreneur, or a creative thinker, you can build a planner setup that fits your lifestyle perfectly.
Here are three real-life examples of digital planner workflows to inspire your own.
Student Workflow Example
Students have a lot to juggle—classes, assignments, study time, and exams. A good planner can help keep all of that in one clear, organized space.
Here’s how a typical student might use theirs:
- Morning Schedule Overview
Start the day with a quick look at classes, tasks, and due dates. - Class Notes
Take handwritten notes during lectures. Some even record audio alongside notes so they can play it back later. - Weekly Study Plans
Break subjects into daily goals. Use checklists to stay on track for the week. - Flashcard & Exam Tracker Pages
Keep track of what needs to be reviewed, exam dates, and how confident you feel in each topic.
This kind of setup keeps school life organized, stress levels lower, and makes it easier to stay ahead.
Entrepreneur Workflow Example
Running a business or working independently? A planner can help you juggle everything from content to client work to finances, without forgetting anything.
Here’s what that might look like:
- Weekly Dashboard
See your top priorities, meetings, and to-dos all in one place. If you’re not sure where to start, try this ready-to-use task planner template. It’s built to help you manage tasks clearly and stay focused day by day. - Content Calendar
Plan out what you’re posting on social media, blogs, emails, or YouTube. If you need a visual layout to start with, try this calendar maker to build a content calendar that fits your workflow. - Client Project Tracker
Keep a separate page for each client with deadlines, ideas, and progress notes. - Income & Expense Log
Track payments, invoices, and expenses in a simple table or budget section.
This setup keeps your business organized and gives you a clear view of what’s working and what needs attention.
Creative Workflow Example
For artists, writers, designers, or anyone creative, your planner can be both practical and expressive. Here’s how a creative person might use their digital planner:
- Daily Journal with Mood Tracking
A space to write freely, reflect, and track how you’re feeling each day. - Vision Boards
Add inspiring images, quotes, or color palettes that keep your creativity flowing. - Idea Space
A section to sketch, write, or brainstorm—no rules, just a creative outlet. - Creative Routine Tracker
Track how much time you spend on creative work, and spot patterns that help you stay inspired.
If you want to bring more structure to your creative energy without feeling restricted, check out this guide on how to increase productivity with a digital iPad planner. It’s perfect for creatives who want to stay inspired and organized.
What Are Some Bonus Tips and Mistakes to Avoid?
Once your digital planner is set up and you’re using it regularly, it helps to know a few extra tips—and what not to do. These small things can make a big difference in how useful (and enjoyable!) your planner is.
Pro Tips to Make Planning Even Better
Here are a few little tricks that can make your digital planning easier, more fun, and more consistent:
- Double-Tap to Undo: Made a mistake while writing or drawing? Just tap twice with two fingers to undo it instantly. It’s like a digital “oops” button!
- Use Seasonal Stickers: Add winter, spring, summer, or holiday-themed stickers to keep things feeling fresh and fun. A simple snowflake or a sun icon can brighten up your pages.
- Join Online Planning Communities: There are tons of people just like you using digital planners. Join a Facebook group or follow a hashtag to get ideas, free templates, or just some friendly support.
- Try a 30-Day Challenge: Want to build a habit? Try a handwriting, journaling, or mood-tracking challenge for 30 days. It keeps you consistent and helps your planner become part of your daily routine.
Common Mistakes to Avoid
Nobody’s perfect, but here are a few things that can make planning harder than it needs to be:
- Overdesigning: It’s easy to get caught up making your planner look beautiful, but if it becomes all about looks, you might stop using it. Focus on what’s helpful, not just what’s pretty.
- Forgetting to Back Up: Always, always save a backup of your planner. If something happens to your iPad or app, you don’t want to lose everything you’ve planned.
- Using Too Many Fonts or Colors: It’s fun to get creative, but too many styles can make your pages feel messy or hard to read. Stick to a few colors and fonts that keep things clean and calm.
Not Using It Regularly: The best planner is the one you use. Don’t aim for perfection, just check in a little each day. Even five minutes is enough to stay on track.
How Do You Make the Most of This New Planning Method?
You know, digital handwriting isn’t just about jotting down to-dos—it’s kind of like giving your brain a cozy little space to breathe. It blends that calm, satisfying feel of writing by hand with the freedom and flexibility of digital tools.
The best way to start? Keep it super simple. Pick one or two pages you’ll use and just roll with it. You don’t need to be perfect—just show up. Even five minutes a day makes a difference..
👉 Want a few simple ways to manage your time better while using your iPad planner? Check out this list of time management tricks for iPad planner beginners — perfect for building good habits without feeling overwhelmed.
And if some days get messy, or you skip a day? Fine. Your planner isn’t a performance; it’s for you. Some days it might be filled with tasks, other days it might just hold a few thoughts, feelings, or random doodles. That’s the beauty of turning it into a little digital journal, a space that’s more about reflection than structure.
Over time, it’ll grow into more than just a planner. It becomes your thinking space, your reset button, your place to feel a little more grounded.
How to Choose the Perfect iPad Planner App: A Step-by-Step Guide
Free iPad Planner Apps: 7 Amazing Tools That Cost Nothing
iPad Organization App: The Complete Guide to Digital Order
The Digital Planner Revolution: How to Master Your iPad with Apple Pencil
Conclusion
Switching to a digital iPad planner with handwriting might feel a little tricky at first, but remember, it’s all about finding what works for you. There’s no perfect setup, no one-size-fits-all formula. It’s your space to organize, create, and plan in a way that fits your life and style.
Take it one step at a time. Play around with layouts, colors, and sections. Use your Apple Pencil to make it personal and fun. And don’t worry about getting everything “right” immediately. The more you use your planner, the more it becomes your personal productivity and creativity hub.
So go ahead; dive in, experiment, and enjoy the process. Your best digital planning days are just a few taps away!
Ready to take control of your day and boost your productivity? Grab your iPad, open your planner, and start planning your best life today!
FAQs
Absolutely! Handwriting helps your brain slow down, so you think more clearly and remember things better. Plus, it just feels more personal, like you’re connecting with your plans, not just typing them out mechanically.
We get the love for paper planners—but here’s the thing: digital planners are way more flexible. You can edit, move things around, search for old notes, and never worry about messy cross-outs. And the best part? It’s all in one device. No more carrying around bulky notebooks!
Yep, but don’t worry—it’s super simple. Just grab an app like Planwiz, GoodNotes, or Notability. They’re built for handwriting, let you organize your pages easily, and work great with templates. Once you try one, you’ll see how smooth it all feels.
100% yes. Most iPad planner apps are made to be beginner-friendly. If you can use a notes app or scroll through Instagram, you’ll be just fine. Just download a template, start writing, and you’ll get the hang of it in no time.
No worries—most people feel that way at first! Try using grid or dot pages to guide your writing, zoom in when writing small text, and adjust your pen thickness until it feels right. Also, a paper-feel screen protector makes a huge difference. It gives you more control and feels more natural.